For a livestreaming project, you need proper technical equipment for image and sound. Here, audio is at least as important as video. Some streaming projects are even planned solely for audio, such as podcasts or radio streaming. This article is about optimizing your audio streaming.
Table of contents
+- What do I need for (audio) streaming?
- The different types of microphones
- What does high audio quality mean?
- How does (audio) streaming work?
- What do HiFi and Hi-Res mean?
- What is MP3 streaming?
- Bluetooth Audio
- What is the highest audio quality? 3D sound or Dolby Atmos
- Briefly summed up: audio streaming sound tips
- Tips for the voice
- 6 tips to avoid sound interference
- Conclusion: Improve streaming sound and build up know-how
Improving the live streaming sound is not only a challenge for inexperienced streamers. Even professionals sometimes have to make various adjustments until they get a good sound result. This has to do with the various influences that can occur during a live stream. These include Internet connection problems, latency, asynchronous transmissions, defective cables or microphones, or non-optimal settings on the equipment. So some of these factors are less controllable than others. However, they have one thing in common: in most cases, you can fix errors or at least keep their impact as small as possible. Streamers should at least be familiar with most scenarios and theoretically know what to do when technical issues occur. A complete network failure is harder to fix, of course. But an audio setting is quickly adjusted and a defective microphone easily replaced.
What do I need for (audio) streaming?
The required technical equipment depends on the streaming scenario you want to realize. There are basically three scenarios: Mobile streaming, desktop software streaming and multistreaming. For this, you can use the social networks, video conferencing or webinar tools, desktop streaming programs or multistreaming software. We recommend you to read this article if you are not familiar with the differences before you start your own streaming project. It’s important to know at least the basics before deciding which equipment you need.
Because all you need for mobile streaming is a smartphone and an Internet connection. In theory, you could even operate without an external microphone or headphones. However, this is not recommended for professional streaming. In the following linked articles, we have summarized which technical resources are required.
Mobile livestreaming equipment (only available in German): smartphone, stable Internet access (4G/5G/LTE) or a Wi-Fi hotspot, headphones, external microphone.
Desktop livestreaming (only available in German): computer, stable internet access, good computer performance, livestreaming desktop software, headphones, external microphone with table tripod or holder. Optional: Recording set, backdrop, live encoder software, live production mixer/hardware live encoder, lighting, cameras, stream key.
Multistreaming (only available in German): Equipment as above, plus: multistreaming software, stream key.
The different types of microphones
Condenser microphones are the most sensitive microphones. They are typically used for recording high-frequency instruments such as hi-hats and cymbals. They must be powered externally, often by a battery or phantom power. Ribbon mics have a warm sound and are less accurate than condenser mics, but are great for recording low frequencies like kick drums and bass. Dynamic microphones can handle high volumes and have the least distortion. These microphones are great for vocals, horns, and amplifiers because they can handle higher sound levels without clipping.

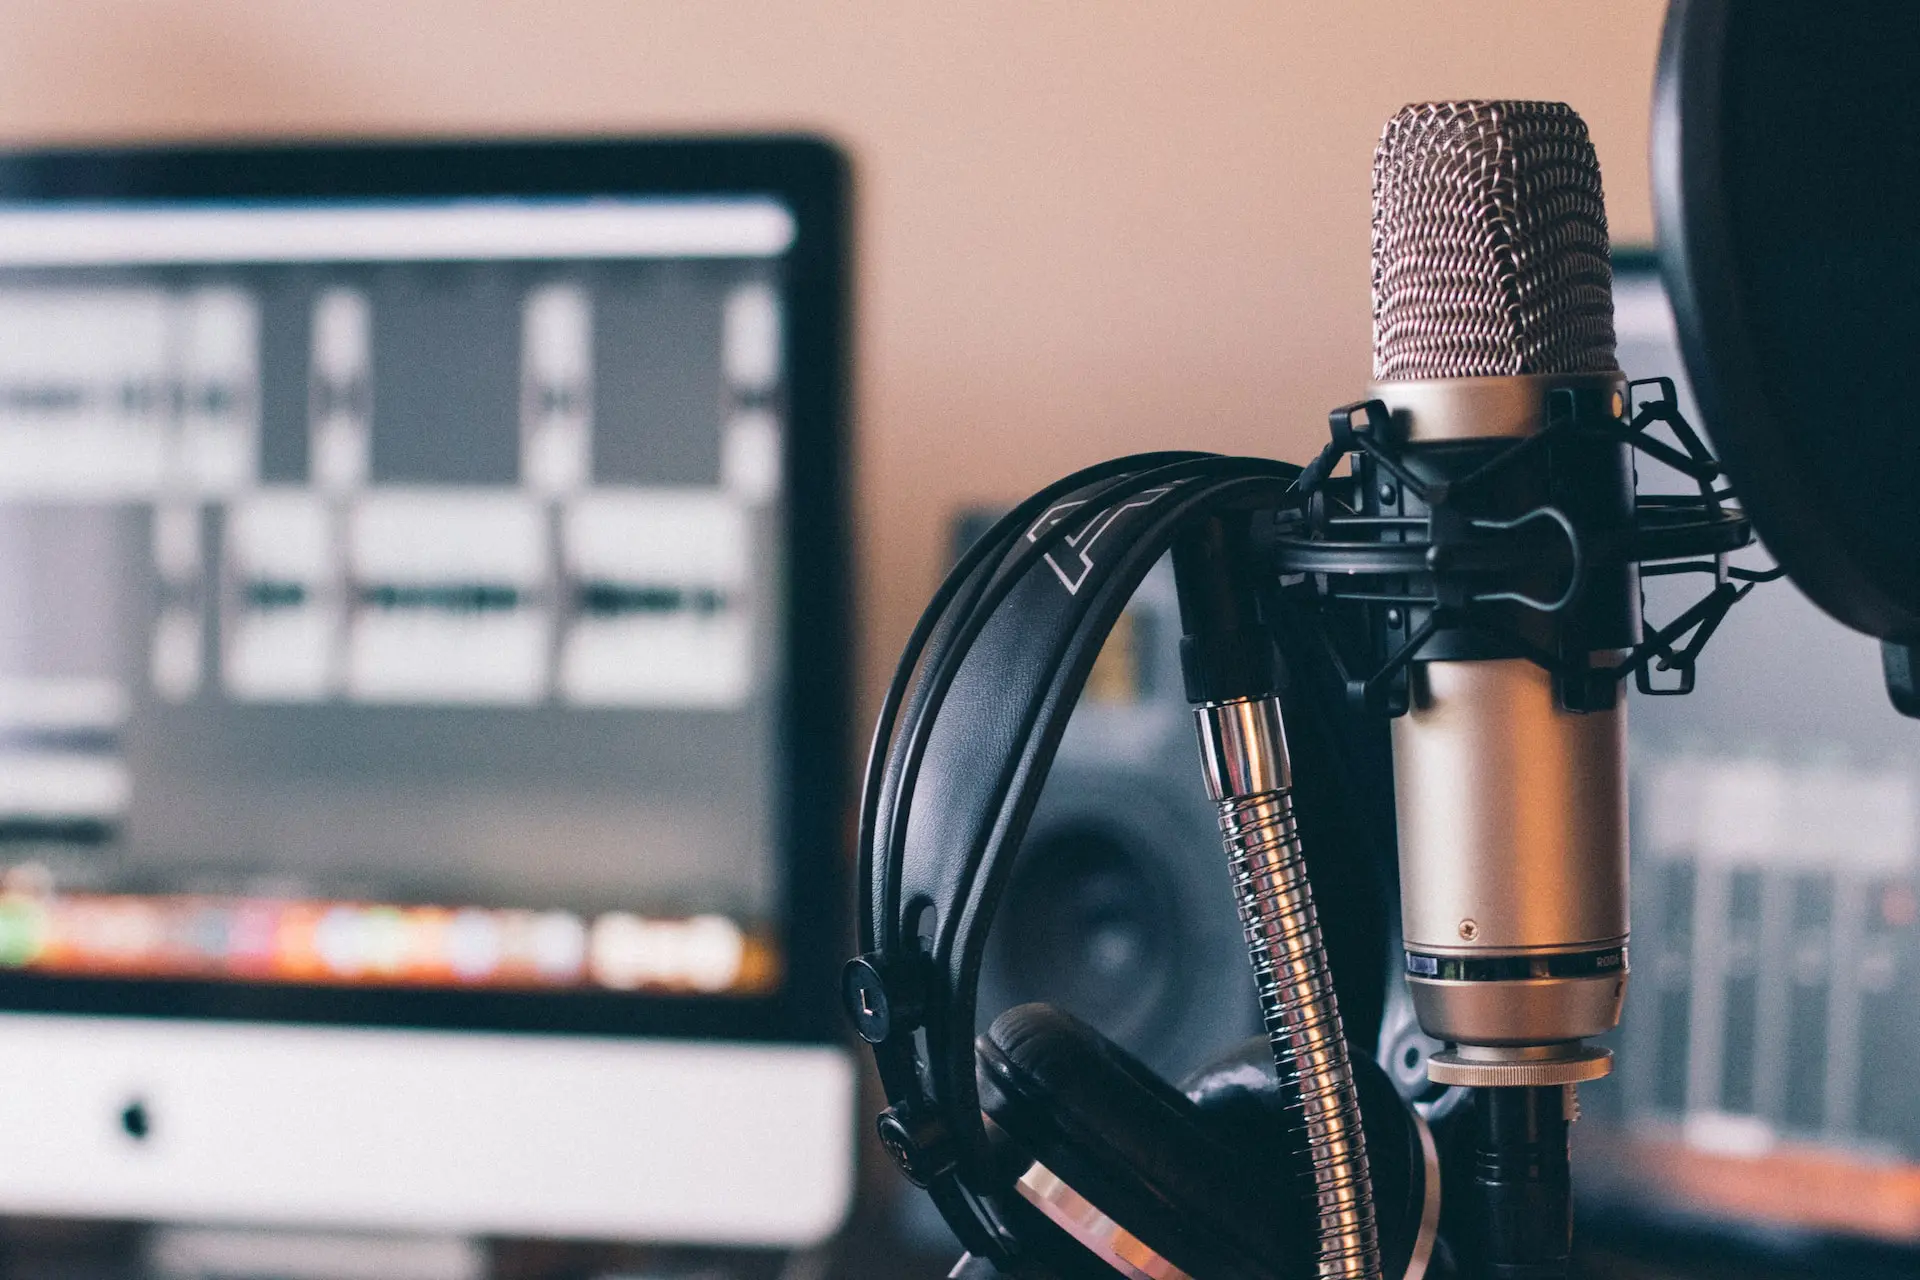
Microphone, headphones and pop shield are part of the basic equipment. Photo: Will Francis / Unsplash
Professional streamers, for example, typically use large-diaphragm condenser microphones with a large diaphragm diameter, or dynamic microphones for live production. Of course, there are also wireless variants. If you plan to use an external cam or multiple cameras, it’s best to find out about the appropriate camera mics for each. Whether camera, desktop, portable or USB—the choice of microphone depends on the overall setting. In terms of price, you will find all ranges—from low to high budget.
Existing directional patterns
The polar pattern of microphones means the way sound is picked up from different directions. It is an important factor in selecting a microphone because it determines how sensitive it is for sound coming from a particular direction. For example, some microphones are more sensitive to sound coming from the front than to sound coming from behind, just like human hearing. This is due to the shadowing effect. The characteristic also affects the way the microphone picks up certain frequencies of sound, resulting in different sounds when recorded from different directions. Therefore, choosing a microphone with the appropriate polar pattern can optimize streaming sound. There are the following polar patterns: omnidirectional, figure-eight, directional, and mixed patterns such as cardioid, wide cardioid, supercardioid, hypercardioid.


Which directional characteristic for which scene?
Streamers usually use either cardioid or supercardioid, because sound coming from the front, i.e., from one direction, is captured best by the microphone this way. The omnidirectional pattern, on the other hand, allows sound to be received from all around, as is often done, for example, in outdoor atmo recording. In an interview situation, a figure-of-eight would be recommended when two people are talking and one is holding the microphone, because this polar pattern picks up sound from the front and back, rather than from the sides. These are just a few of numerous examples.

Podcast audio streaming. Photo: pr/cherry
Product suggestions you can find here:
- USB microphones from Cherry
- Large diaphragm mics from Rode
- Various dynamic mics
Microphone tripods
For a microphone, you typically also need a tripod. Unless you are using a clip-on microphone. It is mostly recommended to buy a set that includes all accessories. Consider whether a microphone with or without a cable is more manageable for your scenario.
Some recommendations:
- Microphone stand from Rode with anti-pop protection
- Microphone from Elgato with swivel arm
- Microphone podcast set from Zoom
Microphone anti-pop or windshield

Basic setup for audio streaming. Photo: AltumCode / Unsplash
Sometimes it happens that speakers produce strong sibilant and plosive sounds. There are two ways to solve this problem: either reduce the distance to the microphone or use an anti-pop filter. A related add-on to the pop shield is the windshield, which minimizes wind noise when you are outside.
Some recommendations:
- Wind and pop filter at Thomann
- Pop filter with kickstand from Rode
- Pop filter from Neumann
- Windshield from Audio-Technica
Which headphones do I need for excellent streaming sound?

Optimize sound with headphones. Photo: Wes Hicks / Unsplash
There are in-ear, over-ear and on-ear headphones. For streaming projects, the over-ear variants are often used. It is important that headphones for live streaming offer good sound, noise isolation and comfort. So-called closed headphones are best for this, as they reduce ambient noise and have large ear cups that provide a comfortable fit. Some even have EQ settings to customize the sound experience. Choose headphones with high-fidelity drivers that produce crystal-clear sound with deep bass and precise treble. Also, make sure they come with replaceable ear cushions to keep them comfortable even after hours of streaming. But using headphones is also significant for your viewers. If you don’t use headphones, this can lead to acoustic feedback on the receiver side, which can negatively affect the entire streaming experience.
However, which headphones are best suited for which project is often a subjective decision, since the fit and sound preferences for the streaming sound play such significant roles here. Different headphones can be found at Teltec or other technology providers.
Find some recommendations:
- Headphone selection from Sennheiser, beyerdynamic or Rode
- Studio, HiFi, Noise Cancel headphones or headset combinations
What does high audio quality mean?
Good audio quality in streaming means that the entire frequency spectrum is available, from deep bass to strong treble. This helps to ensure that the listening experience is as close as possible to the original source, so that the audience can hear the full audio spectrum. Hi-fi and Hi-Res streams provide this high-quality sound. Normal MP3 streaming usually can’t keep up—more on the MP3 format later in the article.
How does (audio) streaming work?
In principle, audio streaming works in exactly the same way as video streaming. The following graphic illustrates the process of data transfer from the sender to the receiver. Here, it is particularly important that the video runs in sync with the audio, because otherwise there is a time offset that significantly impairs the streaming experience.

What do HiFi and Hi-Res mean?
HiFi is short for High Fidelity of Sound. It refers to the quality of sound that is higher than standard compressed MP3 files or streaming offerings. Hi-Fi audio has a resolution of 16 bits and a sampling rate of 44.1 kHz, resulting in an average data rate of 1,411 kbps (or 800 kbps with lossless compression). This means that listening to HiFi-audio preserves sound details like those of artists and sound engineers—something that would otherwise be lost. HiFi music is therefore the best way to experience a recording at its best.
Hi-Res stands for High Resolution and is a way of producing music as close as possible to the original studio quality. It typically is 24-bit and 96 kHz, resulting in a data rate between 2,304 and 9,216 kbps. Hi-Res offers an enhanced listening experience with greater clarity and depth compared to standard streaming audio quality. The range of Hi-Res tracks varies from provider to provider: Apple Music offers nearly 20 million tracks, while Amazon Music HD and Tidal each offer 7 million tracks. Deezer does not currently offer Hi-Res streaming.
What is MP3 streaming?
MP3 streaming is the online transmission of audio files encoded in MP3 format. It provides quick access to streamed music, such as a music library, without requiring users to download and store the files locally. With this technology, the audience hears streamed music from multiple sources simultaneously, and at best, without interruptions from buffering or pauses due to slow downloads. All that said, the compression has greater loss compared to Hi-Fi or Hi-Res. This makes MP3 streaming an everyday streaming format for listening to music on the go. However, to have qualitatively better streaming sound, one should possibly rely on other formats. However, thanks to the relatively small file size and efficient data compression, MP3 streaming saves network bandwidth compared to other formats like WAV or FLAC, which is indeed an advantage.
Bluetooth Audio
Nowadays, there are more and more headphone and microphone products that support Bluetooth. This is certainly a good solution for everyday use, but it is less advisable for professional streaming. This is because there are quality losses with Bluetooth transmission. Thus, Bluetooth headphones do not work with HiFi quality, or only to a very limited extent. That means: If you want to stream with Hi-Res or HiFi sound quality, you should use headphones with a cable connection.
Experience has shown that it is sometimes difficult even with Bluetooth headphones in a conference streaming scenario. This is because the headphones often lose the Bluetooth connection.
What is the highest audio quality? 3D sound or Dolby Atmos

Immersive listening experience with smartphone and headphones. Photo: Matoo.Studio / Unsplash
Dolby Atmos, or 3D audio, is an advanced sound technology that enables an immersive listening experience. It uses multiple speakers placed in front of, behind, and even above the audience to create a three-dimensional sound field. The object-based mixing system assigns sounds – such as instruments and effects – to specific speakers based on their spatial position. This means that audio engineers no longer have to mix sound by channel, but instead can assign a position to each sound object based on metadata.
3D audio works not only via amplifiers or receivers of a system that supports Dolby Atmos, but also via corresponding headphones. Unlike the HiFi system, where the sound is sent to the various speakers, 3D audio works here with HRTF (Head-Related Transfer Function) and so-called binaural sound. The abbreviation of HRTF says that we perceive audio signals differently depending on the direction.
Briefly summed up: audio streaming sound tips
- Check the Internet connection.
- Use headphones to hear yourself better and have less sound leakage.
- Check streaming services and select appropriate software.
- Reduce ambient noise as much as possible.
- Check the audio settings on the sending device – in the equalizer settings. These depend on what you want to produce, so there’s hardly any “right” or “wrong” here. Some hints:
- Balance: emphasize the right or the left side
- Bass level: emphasize or cut low frequencies
- Treble: attenuate or emphasize high frequencies
- Midrange: emphasize or attenuate mid frequencies
This video shows some more details:
Tips for the voice
Depending on the type of microphone you choose, you should make sure to keep a suitable distance so that the sound quality is optimal. For example, microphones have different options for volume adjustment and frequency ranges.

Streaming setup with a standing position. Photo: Malte Helmhold/ Unsplash
In a technical test, pay attention to how strongly the so-called sibilants and plosives come out. If they are too loud, this can cause a less pleasant listening experience for the audience. To avoid this, you can either vary the distance to the microphone, speak a little past the side of the microphone or install a pop shield on the microphone. This protection ensures that sibilants and plosives are filtered out.
If you have little experience with speaking a lot and especially for a long time at a stretch, on the one hand you can do a few breathing or speaking exercises to warm up. On the other hand, there is a trick that helps you get out of breath less quickly when speaking. When you set up your live streaming spot for standing, your body is automatically in an upright position. This means that your respiratory system and the entire front of your body is not bent. So there is more room for the air to speak.
Finally, of course, you can take professional voice and speech training.
6 tips to avoid sound interference
You’ve planned a live event, but you’re sitting in an open-plan office or have constant noise running in the room, such as air conditioning in the background. There are a few ways you can minimize noise sources live. The following is about live productions.
1. identify sound interference in the livestream
Possible sources of interference can occur for many reasons. These include air conditioning, heating, fans, voices, running water, street noise from open windows or similar, but smartphones can also cause noise. Identify the sources and try to minimize them before the live event starts. This can sometimes be difficult in some circumstances. Then consider whether you can find an alternative location.
2. proper technology
First of all, you should check if the technology is set up properly. That means: check if cables, connections, microphone and the sound card of the computer work by starting a test run. You can also record the environment, i.e. the atmosphere, and listen to the recording. In most cases, you can find the sources of interference directly.
3. microphone setup
The set-up for live streaming should at best be done together with technical experts. Be sure to use an external microphone; most internal computer microphones are not of high enough quality. Position the microphone at a reasonable distance from the person speaking. Not too close, so that no breathing noises can be heard. Not too far, so that background noise from the room is picked up as little as possible. A pop screen or windscreen is generally recommended.
4. system settings on the computer
It is possible to minimize the recording of background noise directly on the computer – Windows or Mac. To do this, go to the system settings in the audio settings and adjust the input volume of your externally connected microphone slightly downwards. Start a test run with the new setting and check the recording.
5. use the functions of the streaming tools
Depending on which tool you use for a livestream, you can look for features like “automatic voice detection” or “push-to-talk” in the settings. These additionally suppress noises.
6. other software tools
In the meantime, you can also find many tools that have been developed exclusively for the purpose of automatically preventing or minimizing background noise live. These tools include Krisp.ai, RTX Voice or Utterly. They advertise themselves as eliminating room acoustics and echo. They also run with numerous communication tools. The costs depend on the personal usage requirements.
Conclusion: Improve streaming sound and build up know-how
To give your audience the best streaming experience possible, it pays to invest once in high-quality technical equipment. This also applies for beginners. Since there are already some inexpensive, but good quality offers for microphones or headphones on the market, you don’t have to plan a very large budget. However, audio is as complex a subject as video – and it is advisable to get to grips with the basics. After all, anyone planning livestreams wants to get a high-quality end result. This is the only way to inspire your target group in the future – and, of course, with exciting content.


 This project has received funding from the European Union’s Horizon 2020 research and innovation programme under grant agreement No 876239, 959379 & 965502.